

A tassel keychain is one of my favorite projects to make; they’re fun and easy and look great in so many different places!
WHAT YOU NEED
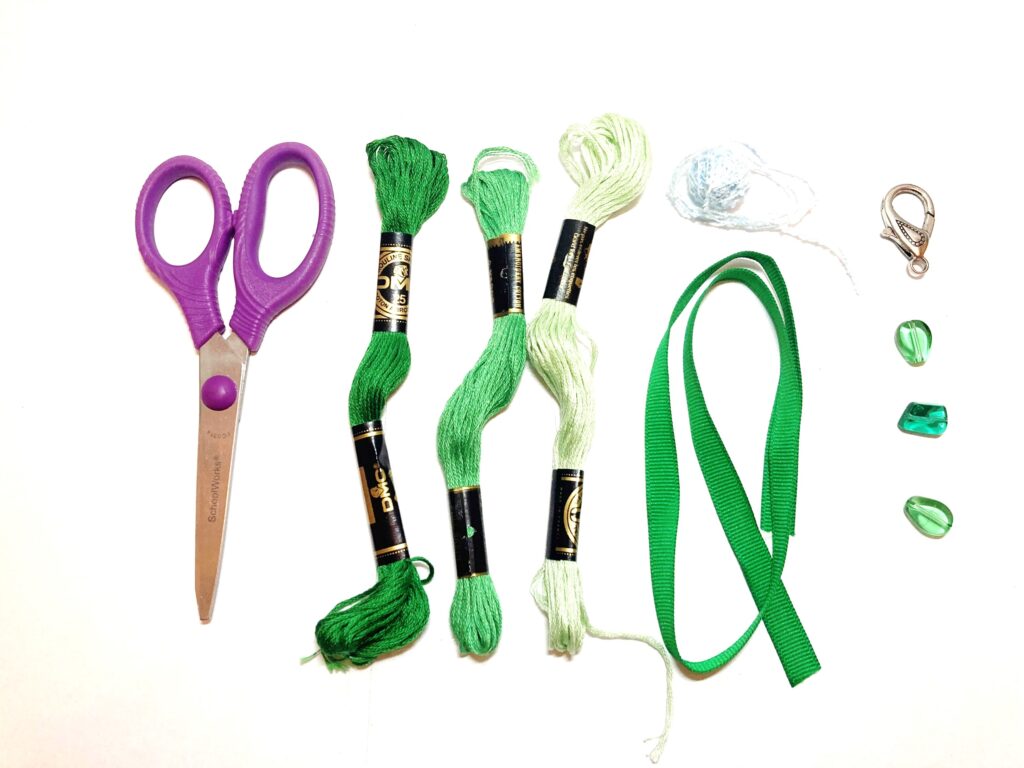
- 3 skeins of embroidery thread (preferably complimentary colors)
- Thread or string
- Scissors
- 3 beads (preferably complimentary to embroidery thread colors)
- Keychain clasp
- Ribbon (optional)
The great thing about this type of keychain is that you can make it as demure or crazy as you want- your colors don’t have to coordinate at all if you don’t want them to!
The thread/string is used to hold your keychain together; I prefer to use colored thread that matches my theme, but string tends to be stronger. Use whatever you’re comfortable with- or whatever you have on hand 😉
1. Cut 18 inches of your string
Starting is simple- cut about 18 inches of your thread/string. You probably won’t need all of it, but it’s better to have too much than too little!
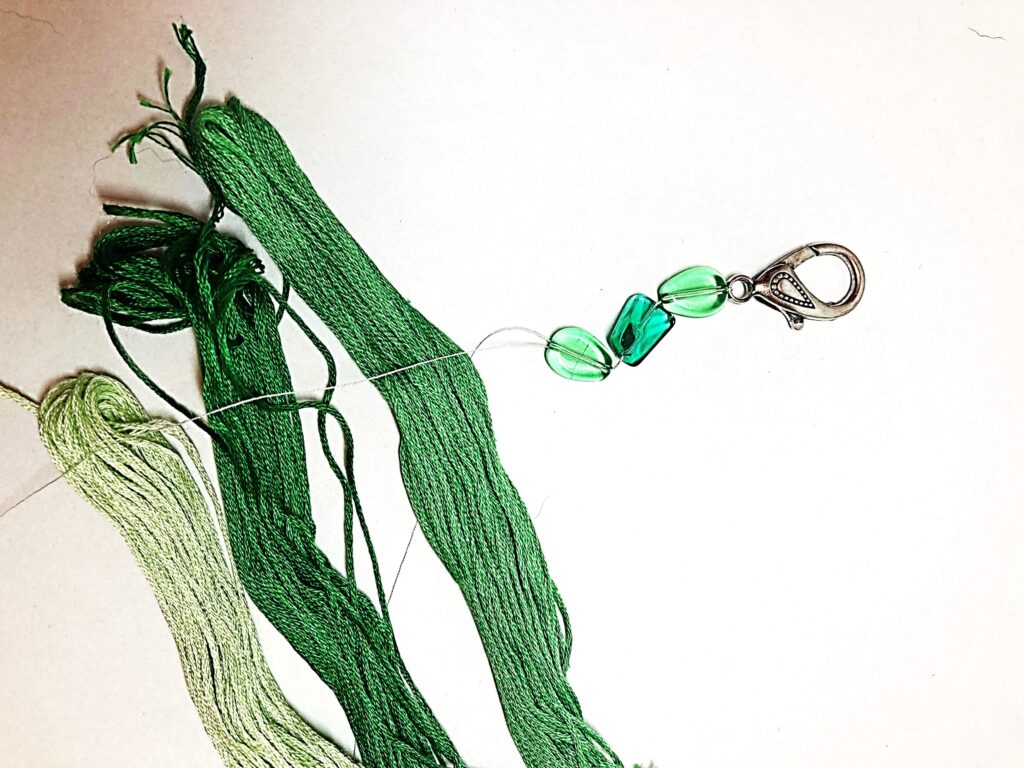
2. Thread your clasp
Thread your string through your keychain clasp, leaving the ends even on both sides.
3. Thread your beads
The beads come in here- thread your string through each bead in whatever order you wish. One thing to remember: make sure you put both ends of the string through each bead.

4. Prepare your embroidery thread
Take any paper holders off of your embroidery thread. Separate the thread below the beads and arrange the embroidery thread between them.
5. Gather and tie embroidery thread
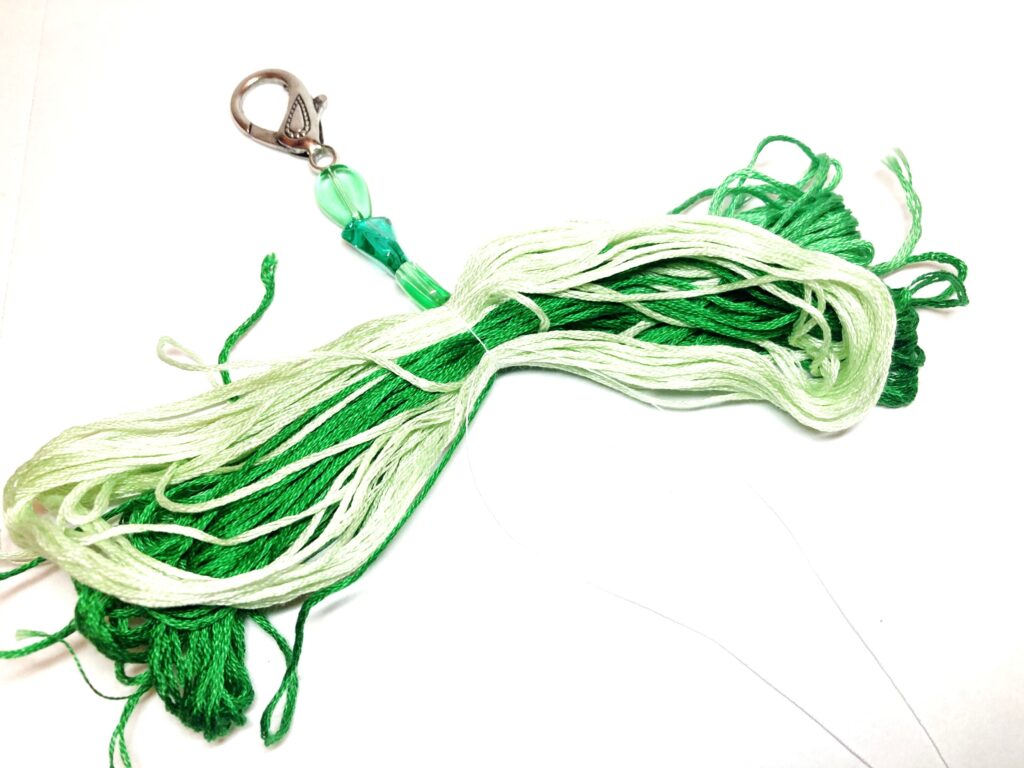
Tie your string in the middle of all your embroidery thread and knot firmly.
This is the only place I’ve ever had trouble with this keychain pattern, mainly because I’ve struggled to knot my string tightly enough around the embroidery thread. Tip to avoid this? Don’t rush yourself 😊
6. Wrap string around embroidery thread
This part may be a little tricky, but take your time!
You want to end up with your thread tightly wrapped around the top of all of your thread, leaving a tassel below.
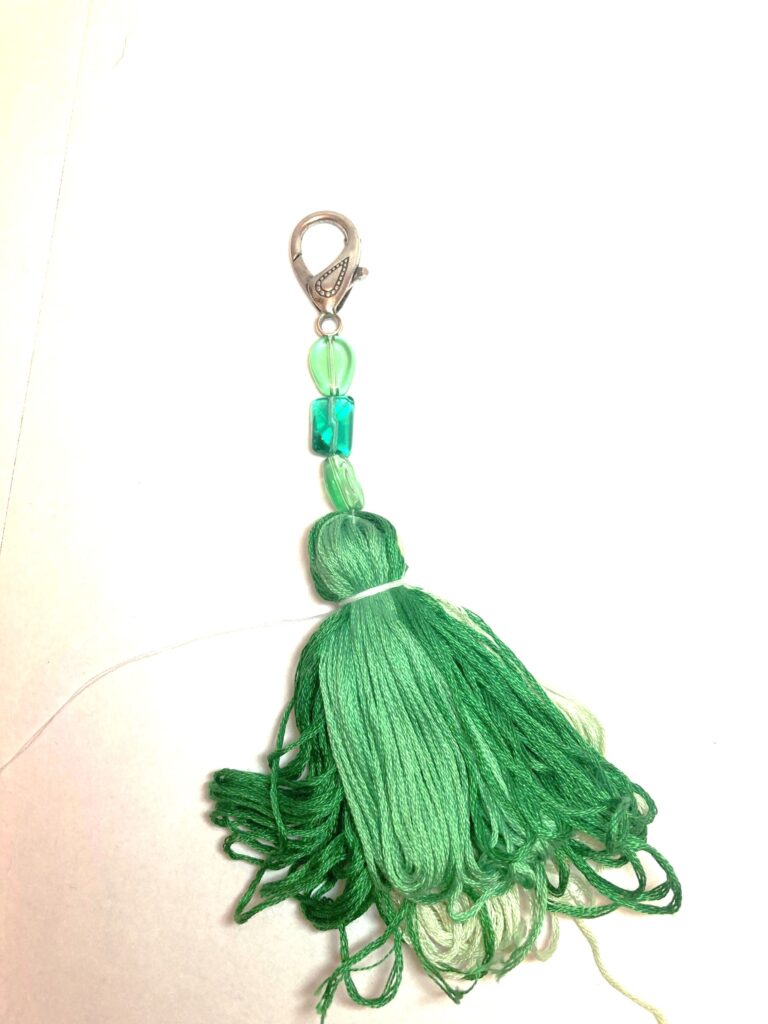
This can be done in several ways; I like to wrap each portion of the string around in opposite directions and knot when I think I’ve wrapped it around enough times.
You can either leave your keychain as is and call it done, or move on to steps 7 and 8!
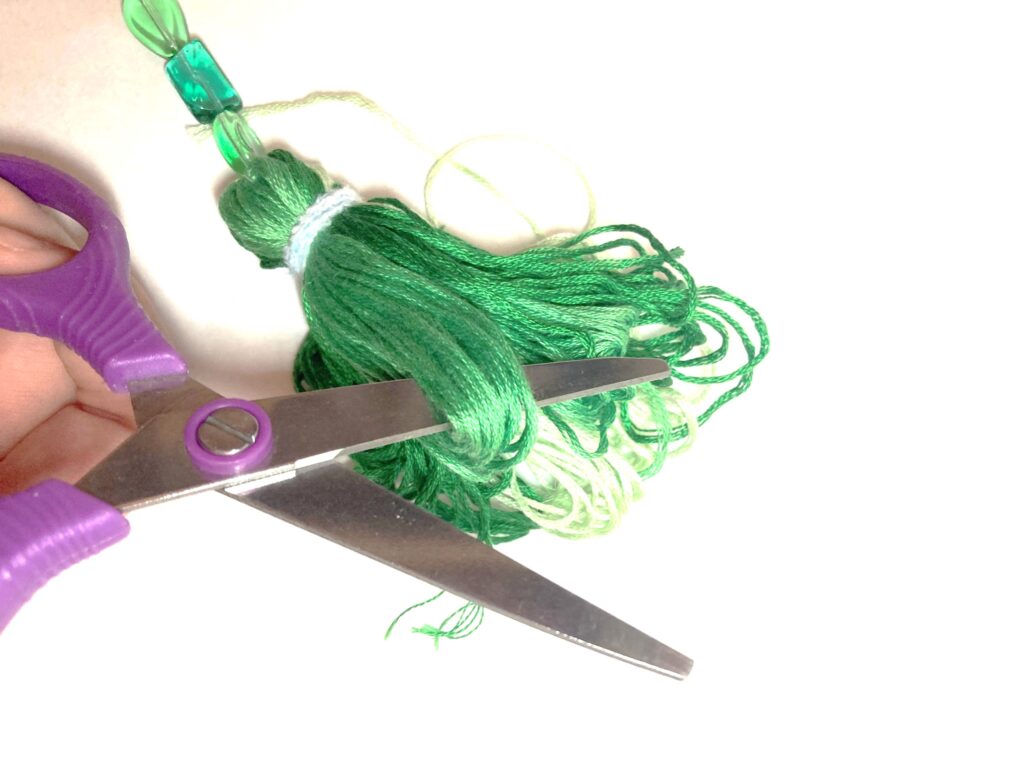
7. Trim tassel ends
This step is where you can make your tassel (as I like to call it) more “tassley.”
Trim your tassel by snipping through the embroidery thread ends (see below photo).
8. Add ribbon or decorative string
I usually like to add some additional decoration to my keychain, whether that be ribbon or a more decorative string. This is completely optional- this is another point where you can truly customize your project!

Conclusion
I hope you found this tutorial both helpful and fun! If you’re interested in improving your tassel keychain skills, check out this awesome tutorial from Carrie Colbert- it’s super fun! 😉
I’m constantly working to improve on both my crafting and writing skills, so feel free to give any feedback you may have! Happy crafting! 😊
“Delight thyself also in the Lord: and he shall give thee the desires of thine heart.”
psalm 37:4
Leave a Reply